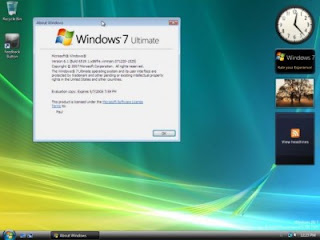
STEP 1 :Insert the Windows 7 installation CD into your computer; ignore any prompts that are displayed.
STEP 2 :Restart your computer and follow the instruction to enter setup or the boot menu.
http://www.blogger.com/
STEP 3 :Select Boot from CD/DVD or similar option, press any key to enter the setup.
STEP 4 :As the system boots you will see the Setup is Loading files and Starting Windows Screen. When you reach the Windows 7 'Install Windows' screen configure the Language, Time and Currency, and Keyboard settings for your computer. Click Next.
STEP 5 :At the next screen, simply click 'Install now'
STEP 6 :This will take you to a 'Setup is starting…' screen, and will eventually produce the 'License Agreement' screen. At the 'License Agreement' screen, accept the terms and click Next.
STEP 7 :You will then be asked what type of installation you want. I always recommend that users do a full reformat rather than an upgrade, so select the 'Custom (advanced)' option.
STEP 8 :At the 'Where do you want to install Windows?' Screen you will see a list of the current partitions on your computer. Select the partitions one by one and select the 'Delete' option.
STEP 9 :When the screen only shows 'Unallocated Space', click Next
STEP 10 :Now the computer will begin to do all of the automatic functions of the setup like 'Copying Windows Files', 'Expanding Windows Files', and 'Installing Features'. The computer may restart on its own once or twice before you see the 'Installing updates' screen. You may also see boot screens that say 'Starting Windows', 'Completing Installation', and ‘Setup is preparing your computer for first use’.
STEP 11 :You will finally be prompted with a ‘Set Up Windows’ screen (Fig 16). Here you should enter both a User Name and Computer Name for the computer. For Computer Name, I prefer to use a naming convention for all my computers similar to LT-CRAZYBOY. I.E. that computer is now LapTop- CRAZYBOY. When you are ready, click Next.
STEP 12 :To note: the next section of setup screens will vary depending on the version of Windows you are installing, as well as things like wireless availability and other hardware factors. If you do not encounter a screen listed here, do not worry about it. If you encounter a screen not listed here, do your best to summarize it and let me know what I missed. Thanks!
STEP 13:At the next screen it is recommended that you enter a password for the computer. If you enter a password at this screen you must also retype the password and enter a password hint. Click Next.
STEP 14 :On the next page enter your Product Key for this version of Microsoft Windows 7. Also, ensure that the ‘Automatically activate’ option is selected. Click Next.
STEP 15 :When the setup asks you about protecting your computer automatically you should choose ‘Use Recommended Settings’ for automatic updates Click Next.
STEP 16 :At the 'Date and Time Settings' screen, configure the settings for your location and click Next.
STEP 17 :Whether or not you have to do this next step depends entirely on your computer’s wireless adapter or lack thereof. If you have a recent wireless adapter installed on your computer Windows 7 will present a screen for joining a Wireless Network. If you see this screen Windows 7 has already identified the proper driver for your wireless adapter as well as detected all of the wireless networks around you. If you have access to a network around you go ahead and configure the network for your home, work, or public use.
STEP 18 :After this Windows 7 will begin ‘Finalizing Settings’ and eventually take you to the new Windows 7 Desktop. Get used to it, as it is a bit different but utterly incredible!
STEP 19 :Your new installation of Windows 7 is now complete! However, now it is time to start configuring the system for your own use.


No comments:
Post a Comment